


Description
Creating customer groups and organizing customer data by group will help you deploy SMS marketing or WhatsApp marketing campaigns that focus on customers. Thereby, it will help you reap many results from your marketing campaigns.
To create, edit, delete customer groups or organize customer data by group, follow the instructions below.
1. How to manage customer groups in SmsMk365.Com?
1.1. How to show list of customer groups?
To show list of customer groups, you go to CONTACTS area => Then you click on GROUPS (1) menu => So the Contact Groups Form show like Illustration 1 bellows:

Illustration 1: List of customer groups
* Remarks:- 1* Area: It shows the group ID of all groups that you can use them for your marketing sms & WhatsApp campaigns next time.
- Delete Selected Items (Icon number 2 in Illustration 1 above): Click on this icon to delete all rows that's selected from the table bellows.
- ADD GROUP (3): click on this button to create the new group.
- 4th read area: It's used to limit rows that's showed in one page of table.
- 5th icon: click on this icon to copy all groups to clipboard.
- 6th icon: Click on this icon to export list of groups to Excel file.
- 7th icon: Click on this icon to export list of groups to PDF file.
- 8th icon (PENCEL icon): Click on this icon to Edit the group's information.
9th icon (TRASH icon): Click on this icon to delete groups.
1.2. How to add a new group?
In list of groups like Illustration 1 above, you click on ADD GROUP (3) button => In new window, you input your group's name in Name (10) box => Final, you click on SUBMIT (11) button to finish. You do it like Illustration 2 bellows.
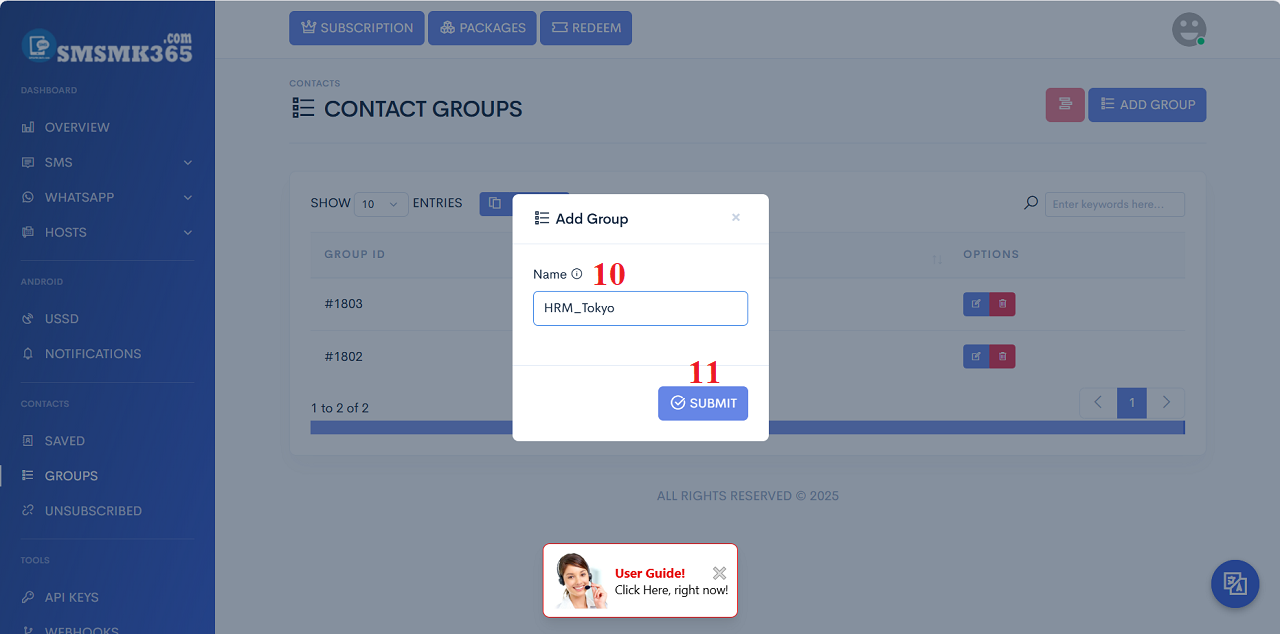
Illustration 2: Add new group
1.3. How to edit information of an existing group?In list of groups window like Illustration 2 above, you click on PENCEL icon (8) that's suitable with group which you need to edit => Then you modify it => Final, you click on SUBMIT button to finish.
1.4. How to delete an existing group?
In list of groups window like Illustration 2 above, you click on TRASH icon (9) that's suitable with group which you need to delete=> after that, that group's deleted.
2. How to add customers into the customer groups in SmsMk365.com?
2.1. How to display list of customers in smsmk365.com?
To show list of customers, so you go to CONTACT area => you click on SAVED (12) menu => Now you can see the customers list like Illustration 3 bellows.
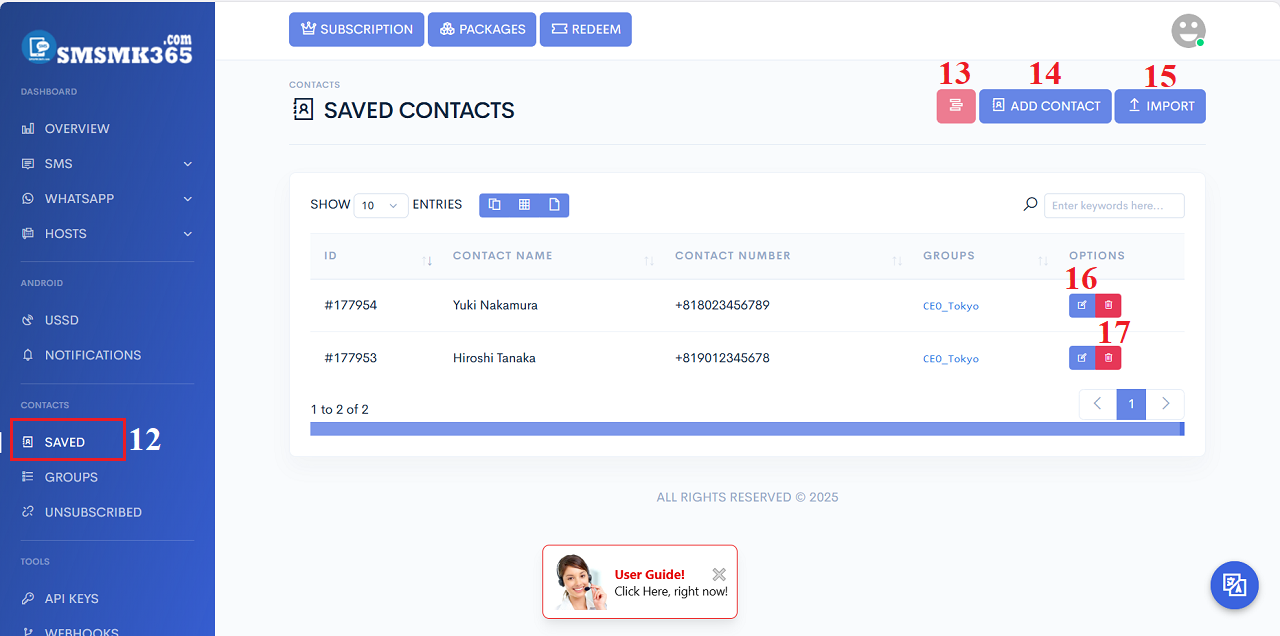
Illustration 3: List of customers
2.2. How to add customer into the customer groups? - Manual method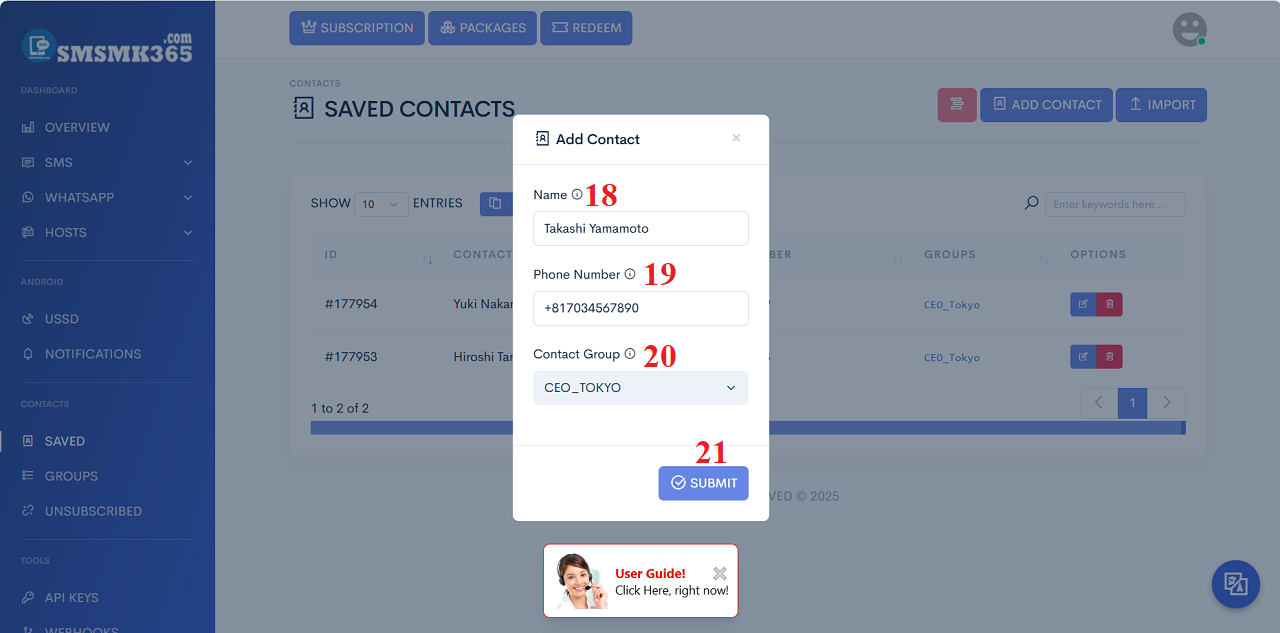
Illustration 4: Add a new customer
- Phone Number (19): You need input your customer's mobile with your country code.
- Contact Group (20): You can choose more groups.
2.3. How to import more customers from Excel file?
In list of customers like Illustration 3 above, you click on IMPORT (15) button => In the new window like Illustration 5 bellows, you click on DOWNLOAD (22) option to download the excel file template => Next, you proceed to organize customer data according to that excel template file => After organizing customer data into that sample excel file, click the CHOOSE FILE (23) button to upload that excel file => Finally, click the SUBMIT (24) button to import customer data in bulk into the group according to that excel file.
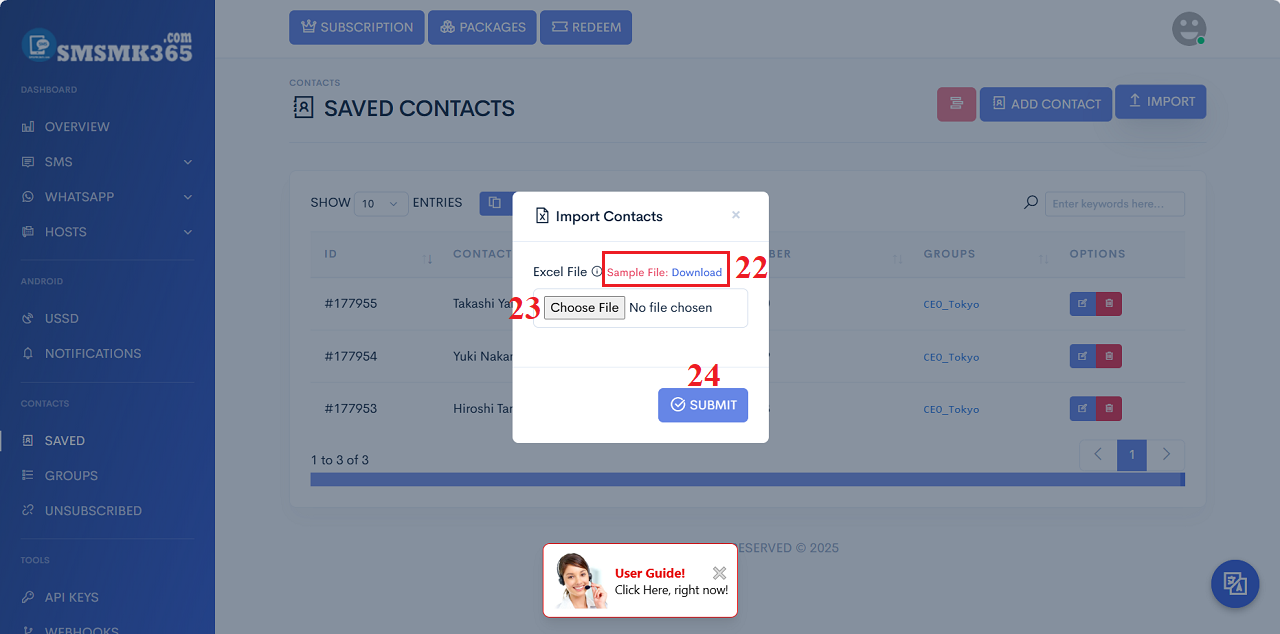
Illustration 5: Import more customers from Excel file
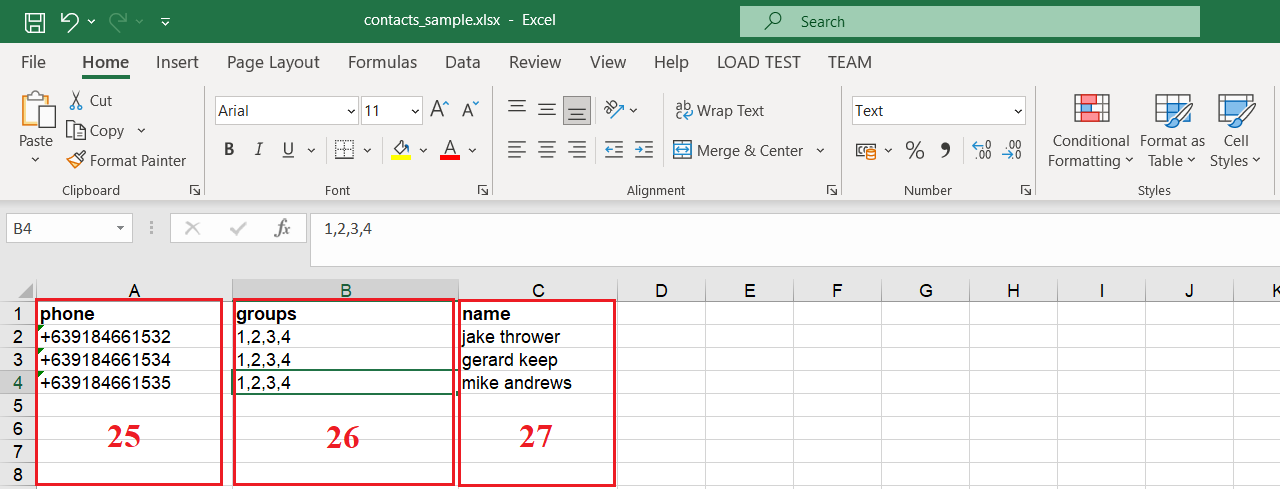
Illustration 6: Sample Excel file used to organize customer data
- Phone column (22): You input your customer's mobiles with your country code.
- Group column (23): You input GROUP IDs. They are separated by commas if there are more than 2 groups. These Group IDs you can get from List Of Groups like 1* areal in Illustration 1 above.
- Name column (24): You input your customer's name there.
2.4. How to Edit a customer's information?
In list of customers like Illustration 3 above, you click on PENCIL icon (16) that's suitable with your customer who you need edit => then you modify it => Final, you click on SUBMIT button to finish.
2.5. How to Delete a customer?
In list of customers like Illustration 3 above, you click on TRASH icon (16) that's suitable with your customer who you need Delete.
2.6. How to Delete more customers?
In list of customers like Illustration 3 above, you click on rows that's suitable with your customers who you need to delete => next, you click on 13th icon like Illustration 3 above to delete them.
prohibitions
*For any questions, please contact us via Email: SmsMk365Agent@gmail.com Or support@smsmk365.com Or Contact us via Form CONTACT for a prompt response.
Related Posts


Send quick WhatsApp messages
 Whatsapp