


Description
To declare and fetch WhatsApp server (or WhatsApp Account used to send WhatsApp messages in bulk), you need to follow the steps below:
1. Step 1: Login into SmsMk365.Com
You have to login into SmsMk365.Com. You can see instructions on how to log in to SmsMk365.Com in SECTION 2 of the article: How to create a free membership account in SmsMk365.Com?
2. Step 2: Open list of whatsApp Hosts
You click on HOSTS (1) menu => then you click on WHATSAPP (2) menu like Illustration 1 bellows to open the list of WhatsApp Hosts.

Illustration 1: List of WhatsApp Hosts
3. Step 3: Add WhatsApp Account To become a WhatsApp HostYou click on ADD ACCOUNT (3) like Illustration 1 above => Next, you choose a WhatsApp Server like SMSMK365_WASERVER (5) => Next, you click on LINK ACCOUNT (6) button like Illustration 2 bellows:
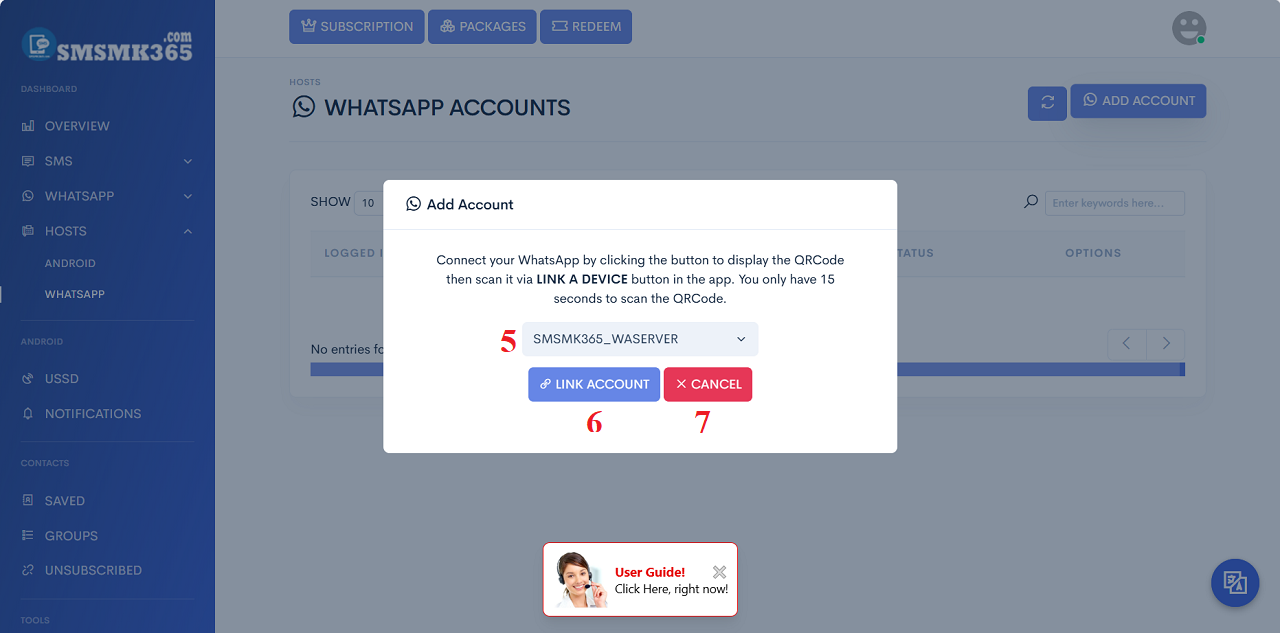
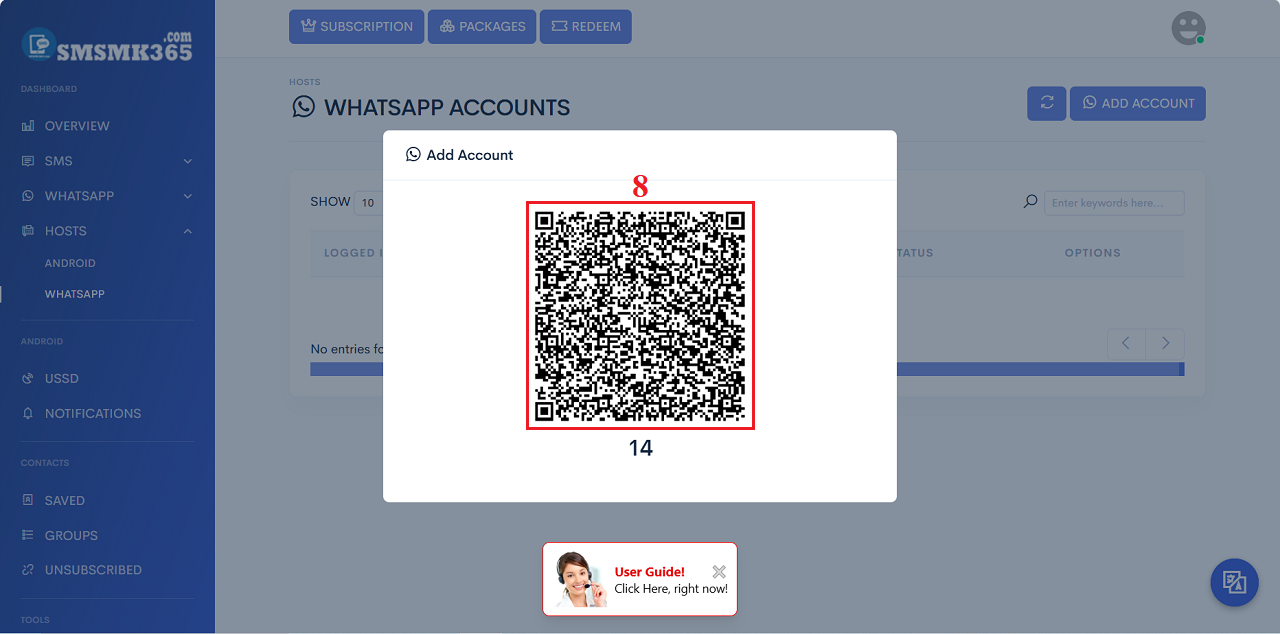
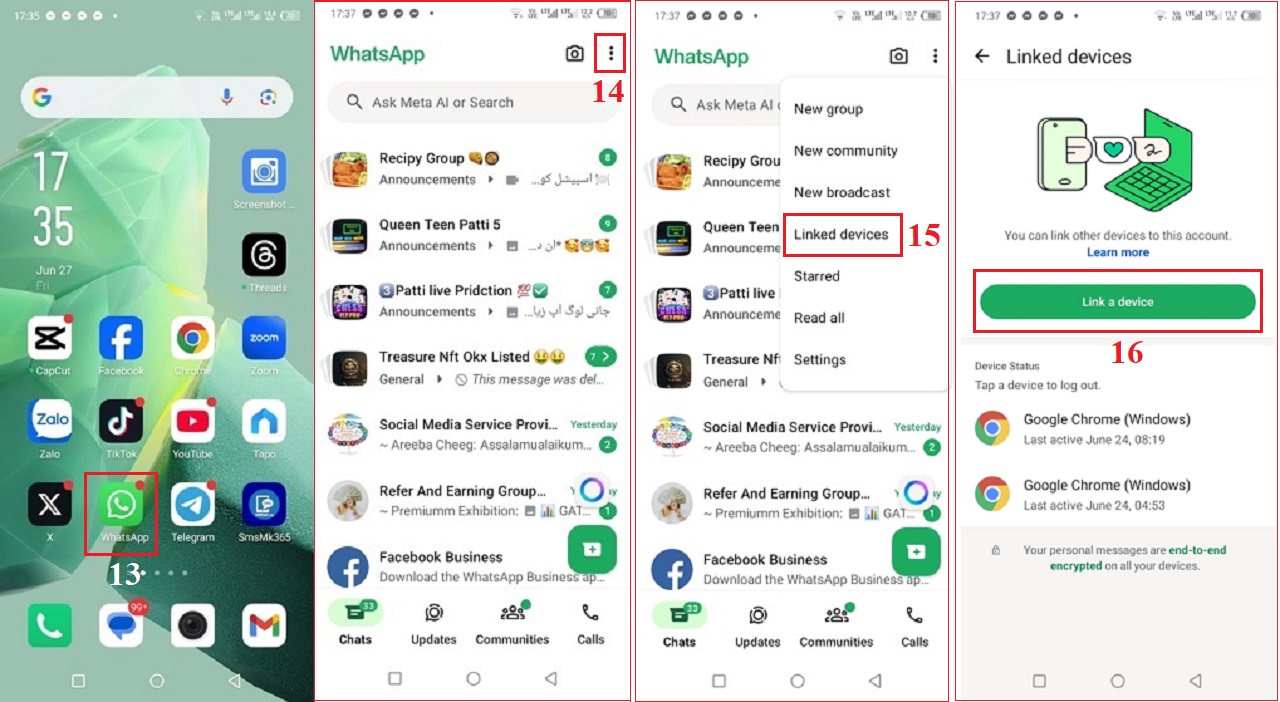
Illustration 4: Open the whatsapp application on your phone to work
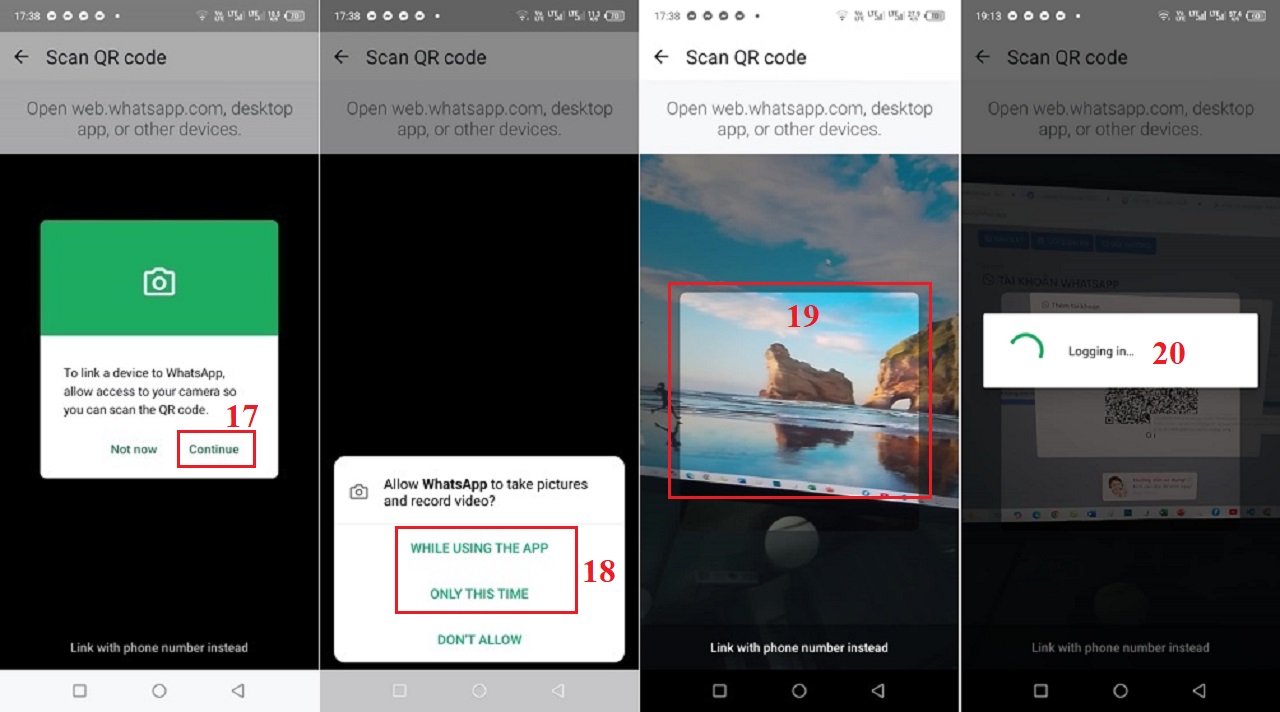
Illustration 5: Open the whatsapp application on your phone to work - Continue
When you move to the red box number 19 as shown in Illustration 5 above, you point the camera at the QR Code displayed on the computer screen as shown in Illustration 3 above to link your WhatsApp account with the Software to automatically send SMS and WhatsApp in bulk from your phone.
After link your WhatsApp Account finish, so you can see your new WhatsApp Host like Illustration 6 bellows:
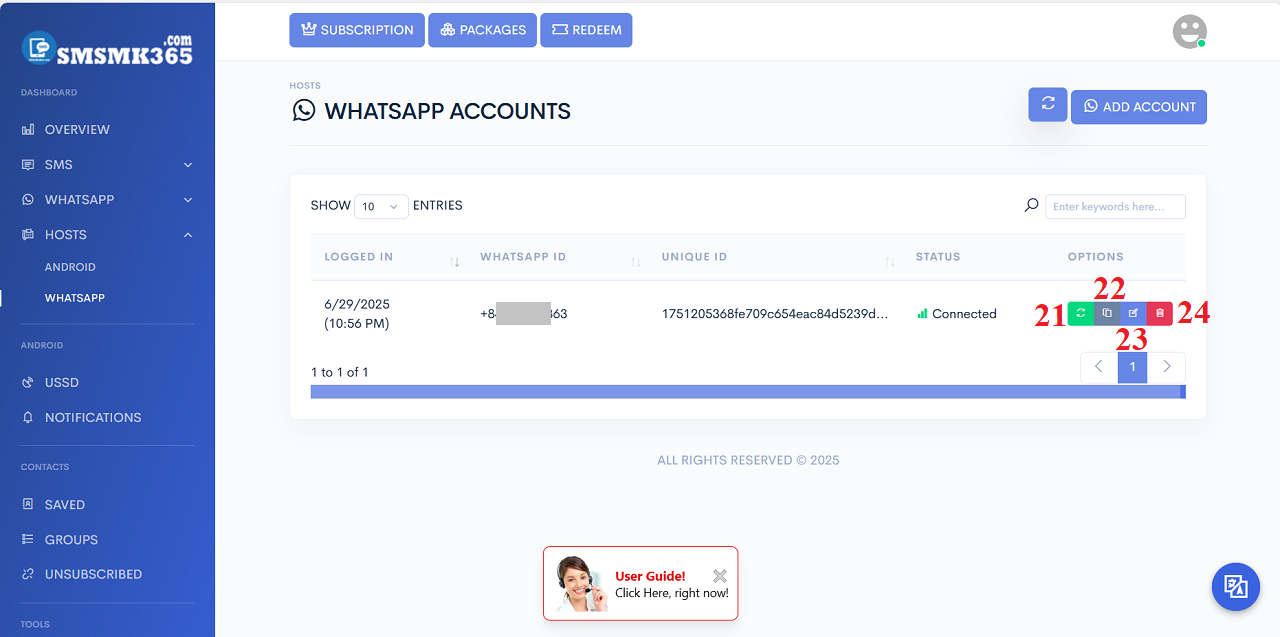
Illustration 6: Result after you had finished to add a new WhatsApp account
* Remarks:- Refresh icon (21): Click on this icon to refresh your WhatsApp host.
- Copy Unique ID icon (22): Click on this icon to get the unique id of your WhatsApp Host that helps you to process your WhatsApp Campaigns in the future.
- PENCEL icon (23): Click on this icon to edit your WhatsApp Host's information.
- TRASH icon (24): Click on this icon to delete your WhatsApp Host.
4. Notes
4.1. You should process the step 1, 2, 3 with your laptop or desktop or other mobile (include Iphone).
But with step 4 you should do it via your android mobile.
4.2. How to edit your WhatsApp Host?
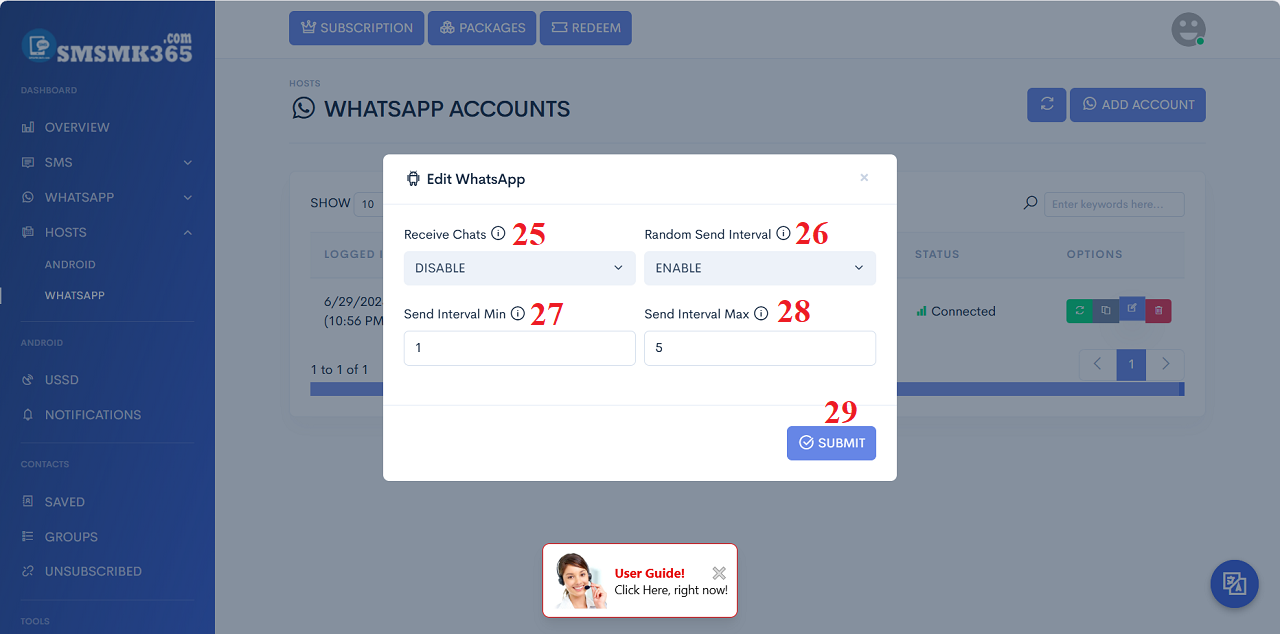
To edit your WhatsApp host, in list of your WhatsApp Hosts like Illustration 6 above, you click on PENCEL icon (23) that's suitable with your WhatsApp Host that you want to edit. Then a new window show like Illustration 7 bellows:
* Remarks:
- Receive Chats (25): If you choose DISABLE value so your WhatsApp Host doesn't get WhatsApp Messages from your customers from WhatsApp App. Otherwise, if you choose ENABLE value so you can get all the WhatsApp Messages from your customers from WhatsApp App.
- Random Send Interval (26): If you choose ENABLE value so after a WhatsApp Message that has sent then Mobile Application'll delay with time that's between Send Interval Min (27) and Send Interval Max (28).
prohibitions
*For any questions, please contact us via Email: SmsMk365Agent@gmail.com Or support@smsmk365.com Or Contact us via Form CONTACT for a prompt response.
Related Posts


Send quick WhatsApp messages
 Whatsapp